In this last part of the blog series we are going to add the floorplan image to an Home Assistant dashboard and make it interactive. We will also add the buttons we created in the previous blog.
You can read the previous part here:
How to create a floorplan in home assistant – part 1
How to create a floorplan in home assistant – part 2
How to create a floorplan in home assistant – part 3
How to create a floorplan in home assistant – part 4
Creating a full screen Floorplan Dashboard
In home assistant you can have multiple dashboards. Like I have one for Tablets and one for phone view. I’m not going to much in depth about this as this will be an complete other topic. For now we are going to create a new full screen dashboard
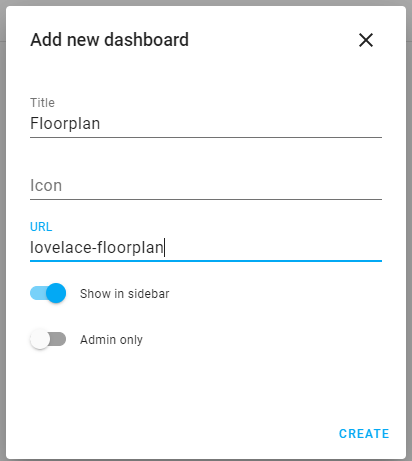
Now that the floorplan is uploaded to Home Assistant we can use it in our new dashboard. First we are going to create a new dashboard. Open Home assistant and navigate to Configuration -> Lovelace Dashboard
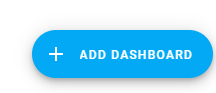
Click the Add Dashboard button
Fill in the title and press Create
After clicking create we will see the new floorplan dashboard in the left side menu
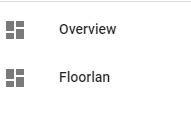
Click on floorplan to open it.
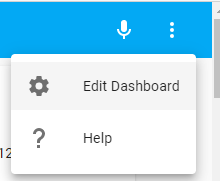
You now see all the sensors you have. Don’t worry they will disappear soon. Click on edit dashboard in the upper right corner
A new popup will be shown. Make sure the selection Start with an empty dashboard in on

Click on Take control and you will see an empty dashboard.
Click on Add Card
Scroll down and select the Picture Elements Card
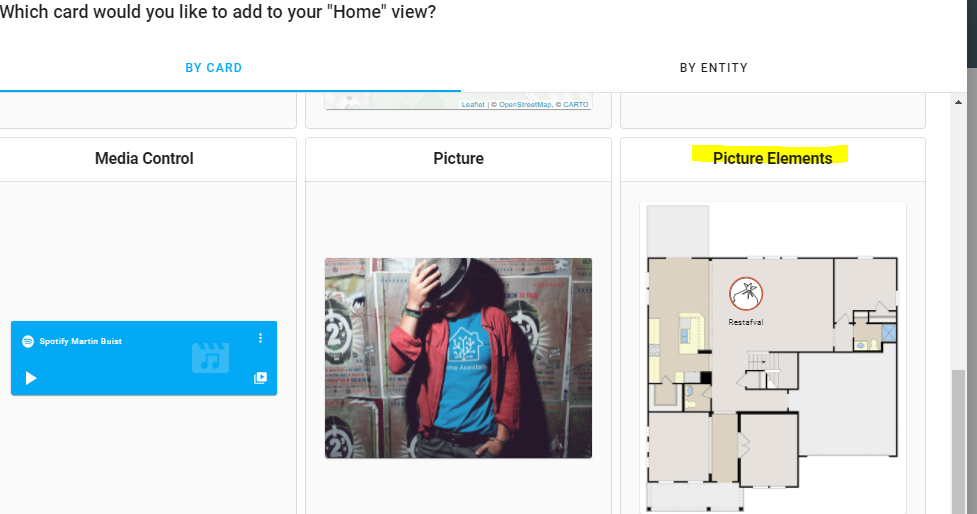
Change the image: to your uploaded image in the www directory. There is already one element in it. Leave this untouched for now.
Click save
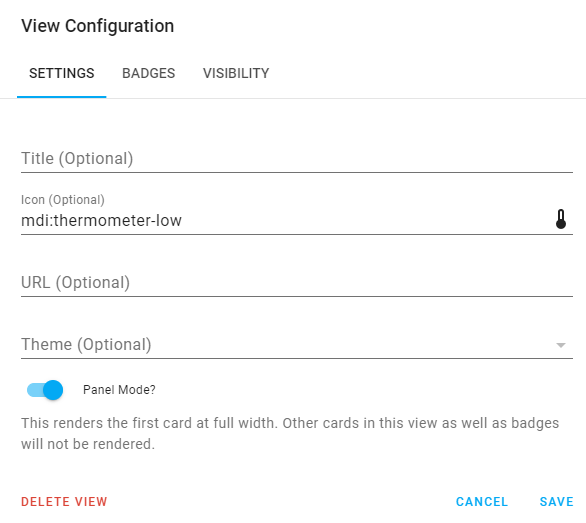
Now the image is not full screen yet. Click on the pencil next to the Home
Delete the Title and put in the icon field mdi:floorplan
Select Panel Mode?
Click save
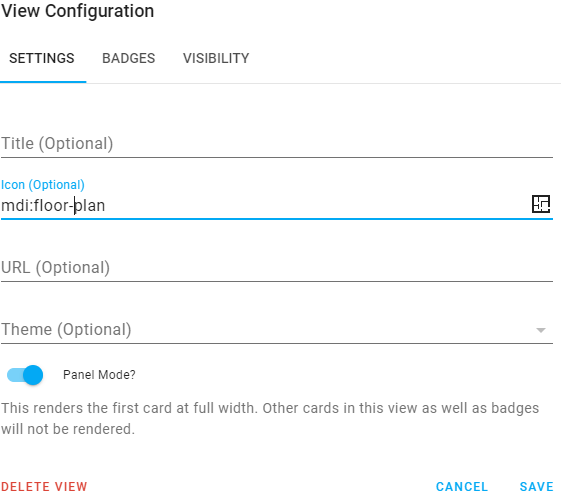
We now have the floorplan in Full on the dashboard

Making the floorplan interactive
Now for the fun and hard part. The part we all have been waiting for. Making it all interactive.
Click on edit dashboard in the upper right corner
The click on edit to edit the lovelace card. If it is out of screen then scroll down
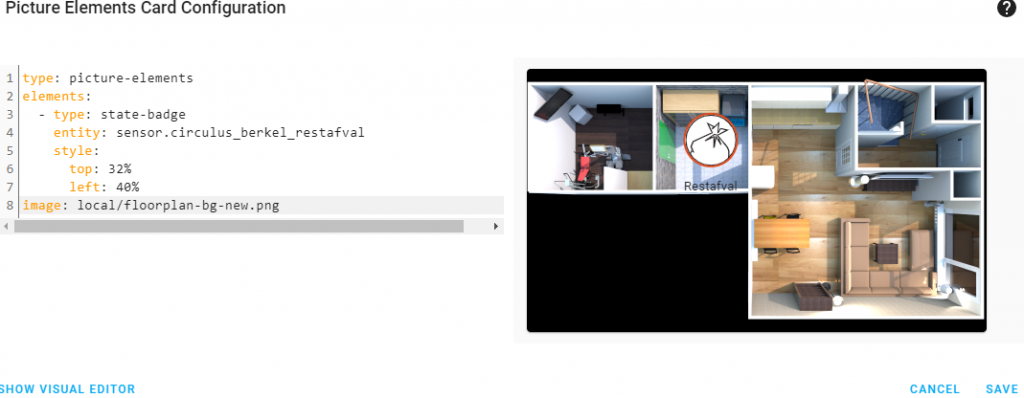
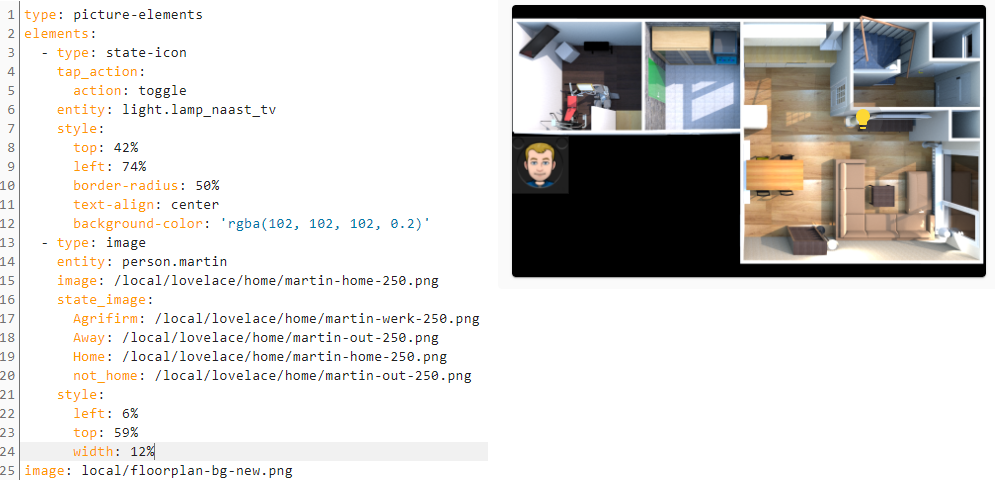
We only need to edit it under the elements tag.
Elements are the active components (icons, badges, buttons, text, etc.) that overlay the image.
There are several different element types that can be added to a Picture Elements card:
- State Badge
- State Icon
- State Label
- Service Call Button
- Icon
- Image
- Conditional
- Custom
The official documentation form Home Assistant can be found here
https://www.home-assistant.io/lovelace/picture-elements/
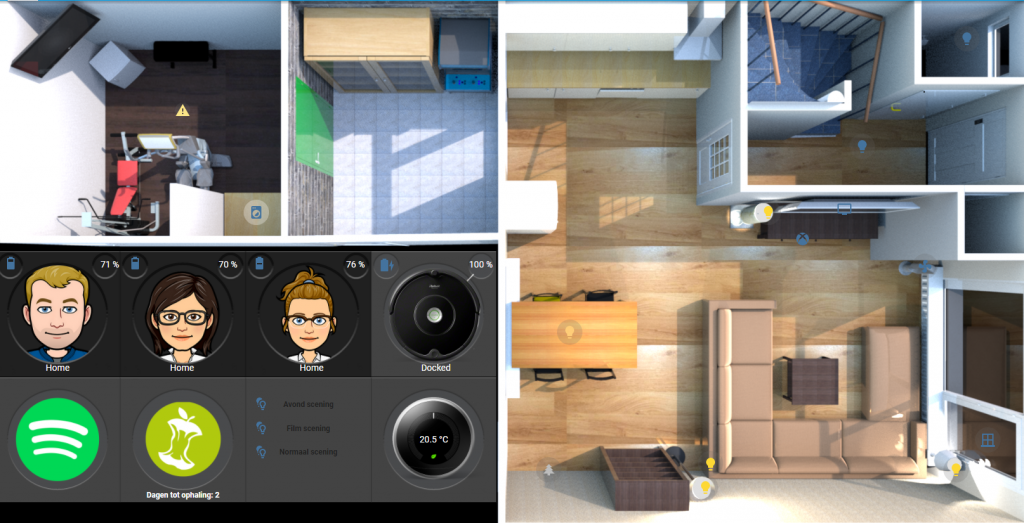
Lights
Let us start with the lights first. We want to show the light icon and when pressing on the icon we want to toggle the light.
- type: state-icon
    tap_action:
      action: toggle
    entity: light.lamp_naast_tv
    style:
      top: 42%
      left: 74%
      border-radius: 50%
      text-align: center
      background-color: 'rgba(102, 102, 102, 0.2)'
Let’s break this down
tap_action – The action that it should do when clicked on it
Entity – The name of the entity ( found under Developer Tools )
Style – The position and background color
Now for the style it uses CSS. What I have done here is is a small icon around the light with and small background color. Just remove the background-color: ‘rgba(102, 102, 102, 0.2)’ and see what happens.
For the top and left if you change those values you will see it move in the right side of the screen as well.
Now if you are happy with the location of the light press the save button
You can now click on the lights
Switches
This works the same as Lights. The only thing here is the entity name and I’m using a custom Icon. You can find a list of icons to use here Material Design Icons
- type: state-icon
icon: 'mdi:fan'
tap_action:
action: toggle
entity: switch.fan
style:
top: 51%
left: 89%
border-radius: 50%
text-align: center
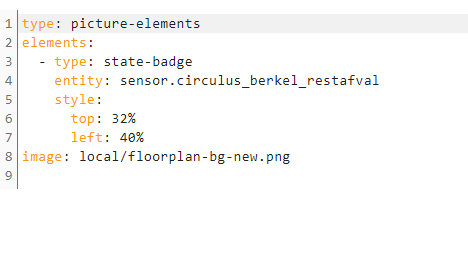
background-color: 'rgba(102, 102, 102, 0.2)'Sensors
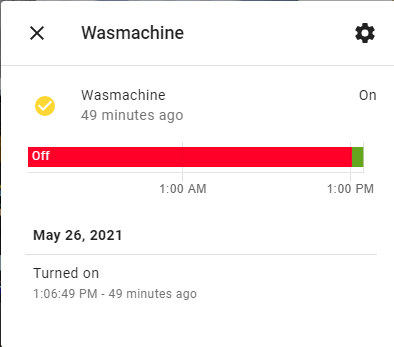
Same as above only we do not have an action to define. I’m using this for the washing machine and see the state of the Windows. The icon will become yellow when the device is active
  - type: state-icon
    icon: 'mdi:washing-machine'
    entity: binary_sensor.washing_machine
    style:
      top: 42%
      left: 25%
      color: '#000'
      border-radius: 50%
      text-align: center
      background-color: 'rgba(255, 255, 255, 0.3)'
      font-size: 11px
      font-weight: bold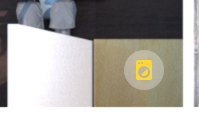
And when clicking on it
You now know the basic and should be able to put most of your lights, sensors or switches on your floorplan
Adding extra buttons to the interactive floorplan
Now for the buttons I use. In the previous part of this blog series we have create the Images for it. In this section we are also going to use more elements then the state-icon explained above
Person
We are just going to change the image based on the state
This is the first part of the code. Only the image. The labels will come later.
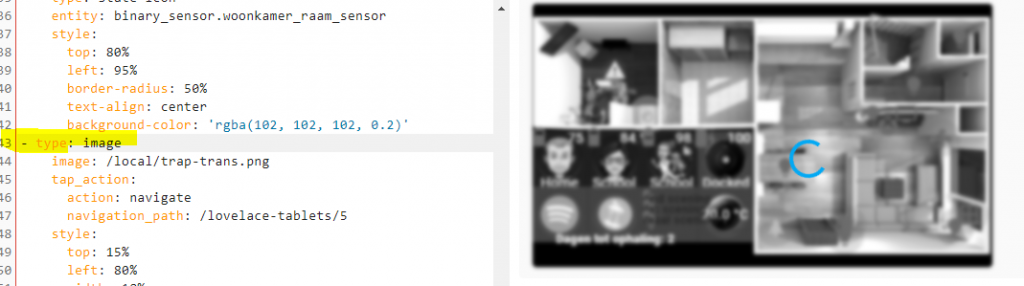
  - type: image
    entity: person.martin
    image: /local/lovelace/home/martin-home-250.png
    state_image:
      Away: /local/lovelace/home/martin-out-250.png
      Home: /local/lovelace/home/martin-home-250.png
      not_home: /local/lovelace/home/martin-out-250.png
    style:
      left: 6%
      top: 59%
      width: 12%
As you notice there is another state. Image. We are only working with images here and change it on the state of the entity. If you tracking other locations you can add them here as well. Like work
Work: /local/lovelace/home/martin-work-250.pngIt is important that al images are the same dimensions
Now that the image is there and it react on the state we can add the label. I have 3 labels
1. Battery State Icon
  - type: state-icon
    entity: sensor.sm_g930f_battery_level
    style:
      left: 1.5%
      top: 50.5%
2. Battery level in %
  - type: state-label
    entity: sensor.sm_g930f_battery_level
    style:
      color: white
      left: 11%
      top: 50.8%
3. Location Label
  - type: state-label
    entity: person.martin
    style:
      color: white
      left: 6%
      top: 68.1%
      text-align: center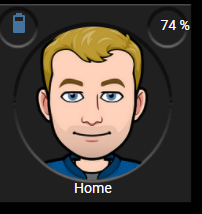
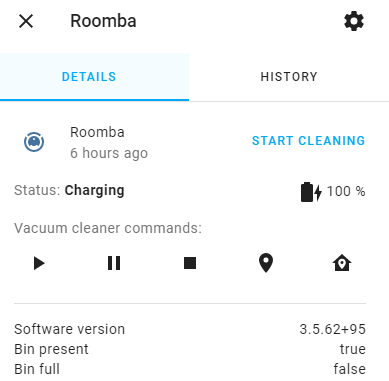
Vacuum
It is basicly the same as above. Drop an Image and add the labels on it.
  - type: image
    image: /local/roomba2.png
    entity: vacuum.roomba
    style:
      top: 59%
      left: 42%
      width: 12%
  - type: state-label
    entity: vacuum.roomba
    style:
      color: white
      top: 68.1%
      left: 42.2%
  - type: state-label
    entity: sensor.roomba_battery_level
    style:
      color: white
      top: 50.8%
      left: 46.5%
  - type: state-icon
    entity: sensor.roomba_battery_level
    style:
      color: white
      top: 50.8%
      left: 37.5%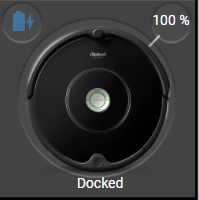
When clicked on
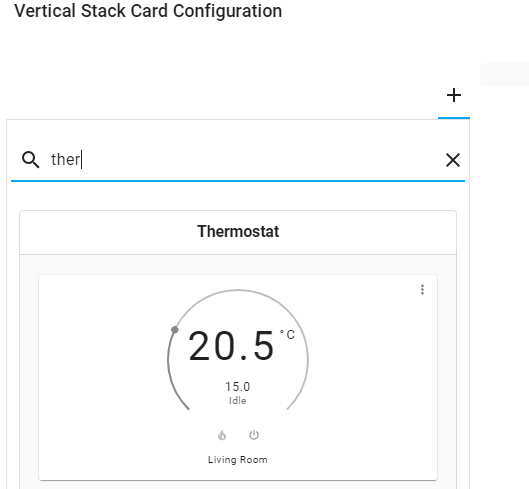
Thermostat
This is an whole other ball game. Up to now we have put in elements that when click on you get a nice popup and have like controls. This is not there for the thermostat.
We tackle this to create a new view in the dashboard that hold the thermostat card. Then when clicking on the thermostat in the floorplan it is going to the thermostat view. We can create a button to go back to the original floorplan view. To make it nicer for a tablet we can hide the thermostat view
Creating the thermostat view and making it interactive
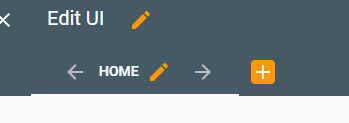
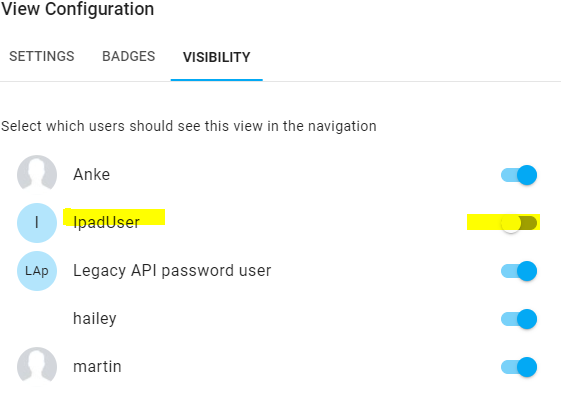
Click on the big + sign to create a second view
I have a diffrent user for the Ipad. This view is hidden for that user
Now that we have a new view we are going to add the Vertical Stack Card. We are going to use 2 tabs. One for the thermostat and one for the button to go back to the floorplan view.
Add card Vertical Stack
Then hit the +sign to add the second card
Select the picture element card
type: picture-elements
elements:
  - type: image
    image: /local/home1.png
    tap_action:
      action: navigate
      navigation_path: lovelace-floorlan/0
    style:
      top: 49%
      left: 6%
      width: 12%
image: local/bgcolor.png
Now we see a different tap action. The navigate action. What we do here is go to the floorplan dashboard and use view 0
If you named your dashboard different you can find the correct naming in the URL of the view. Also notice the URL of the dashboard we just created

Now we add the button to the floorplan dashboard. Go back and edit the floorplan card
  - type: image
    image: /local/nest1.png
    tap_action:
      action: navigate
      navigation_path: /lovelace-floorlan/1
    style:
      top: 80%
      left: 42%
      width: 12%
  - type: state-label
    entity: sensor.living_room_thermostat_temperature
    tap_action:
      action: navigate
      navigation_path: /lovelace-floorlan/1
    style:
      color: white
      top: 80%
      left: 42%
As you can see here I also put a tab action on the label. I have used the same technic to add the spotify button and the garbage collection button
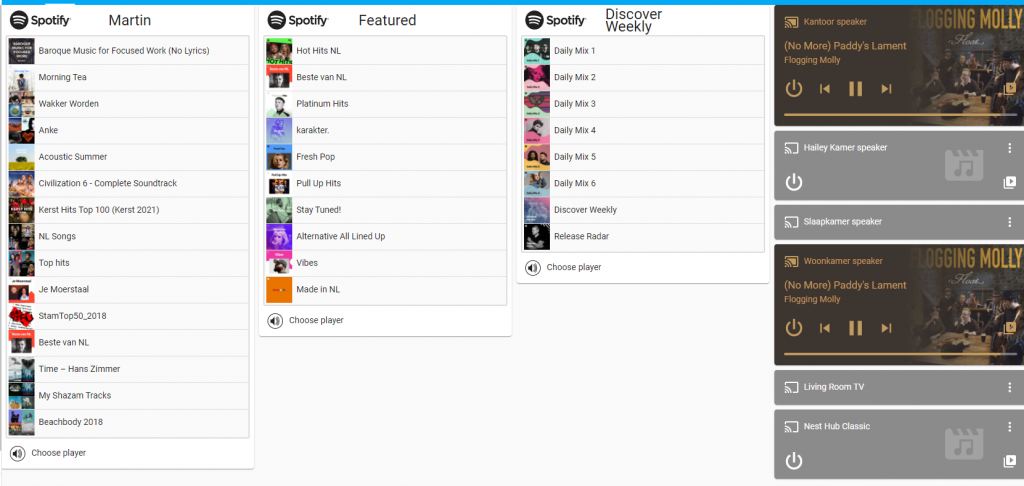
Spotify
When clicking on the button
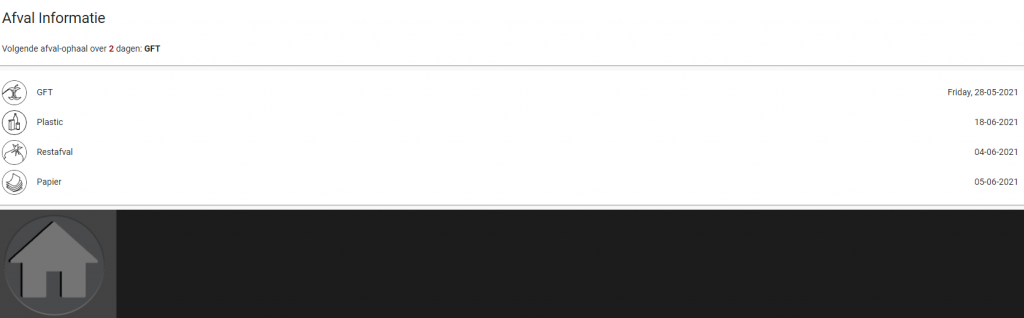
Garbage collection
When clicking on the button
Now you should have the knowledge and ideas to finish your interactive floorplan
Extra tips and tricks for your interactive floorplan
Errors
If you change something and the example keeps loading this normally means there is a line up not correct. In this example there are 2 spaces missing before the – type
Clicking on Stairs in the floorplan
I have put a second floor in this as well and when clicking on the stairs it is going to the next floor. The next floor is an other image I created with SeetHome3D. But in the floorplan in home assistant I have created an image with 100% transparent and put that on the stairs. When clicking on it, it navigates to another view that hold the second floor image and buttons. I did the same to go back to the first floor